
The Author Clock Guide
Learn how to set up, use, and care for your Author Clock
First Time Setup
Your Author Clock will help guide you along the setup process step by step. To begin, press the brass crown on the side to turn on the device and follow the onscreen instructions.
During setup, your clock will connect to Wi-Fi, set the correct time, and guide you through simple ways to personalize it, like choosing your font, quote frequency, and whether to show a digital clock.
Setup usually takes three to five minutes. Once connected to Wi-Fi and set to your preferences, the clock runs independently.
Re-run Quick Setup
If you’d like to adjust your clock’s settings or connect to a new Wi-Fi network, you can run Quick Setup at any time. Simply press the brass crown, scroll to Quick Setup, and follow the onscreen steps to make your changes.
Quick Fixes & Updates
Setup Quick Fixes
Try running Quick Setup again using a different device or a different web browser. If that doesn’t work, open it in incognito mode and try again. If that doesn't work, go directly to 192.168.4.1 in your browser instead of the captive website address.
Yes. Author Wi-Fi is designed only for setup and won’t allow general web browsing. Simply open a browser and go to captive.authorclock.com to continue.
General Quick Fixes
If you are seeing corrupted or empty quote screens your Author Clock may need a full software reinstall. Please scroll to the orange section at the bottom of this page and follow the instructions to manually reinstall your device's software.
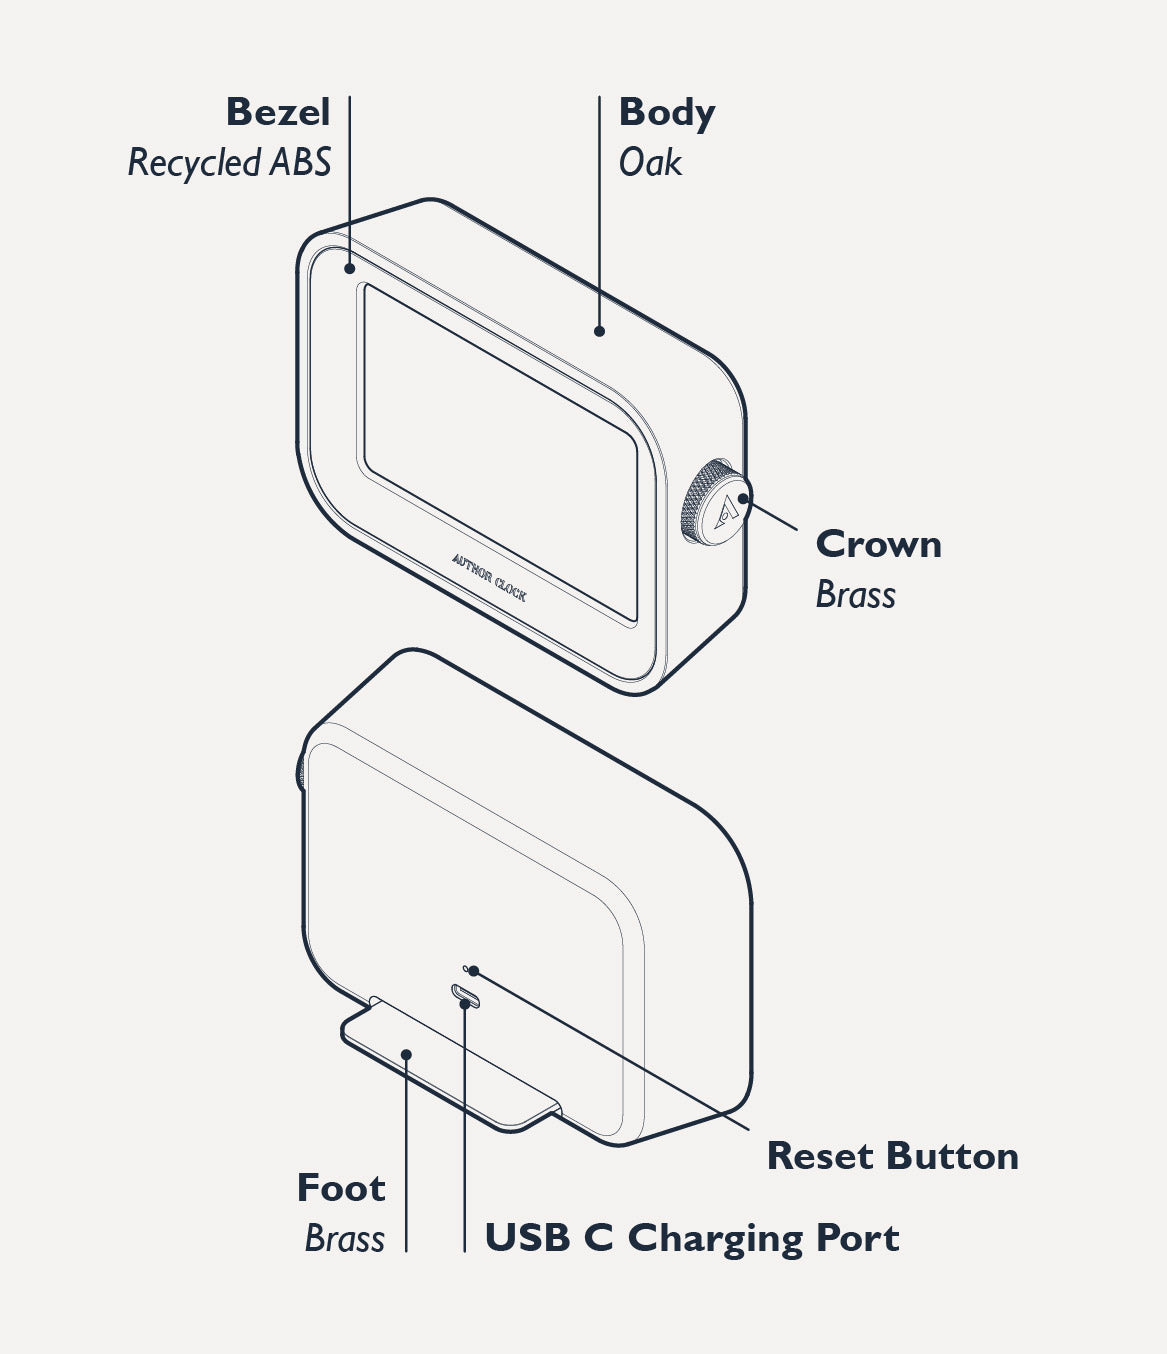
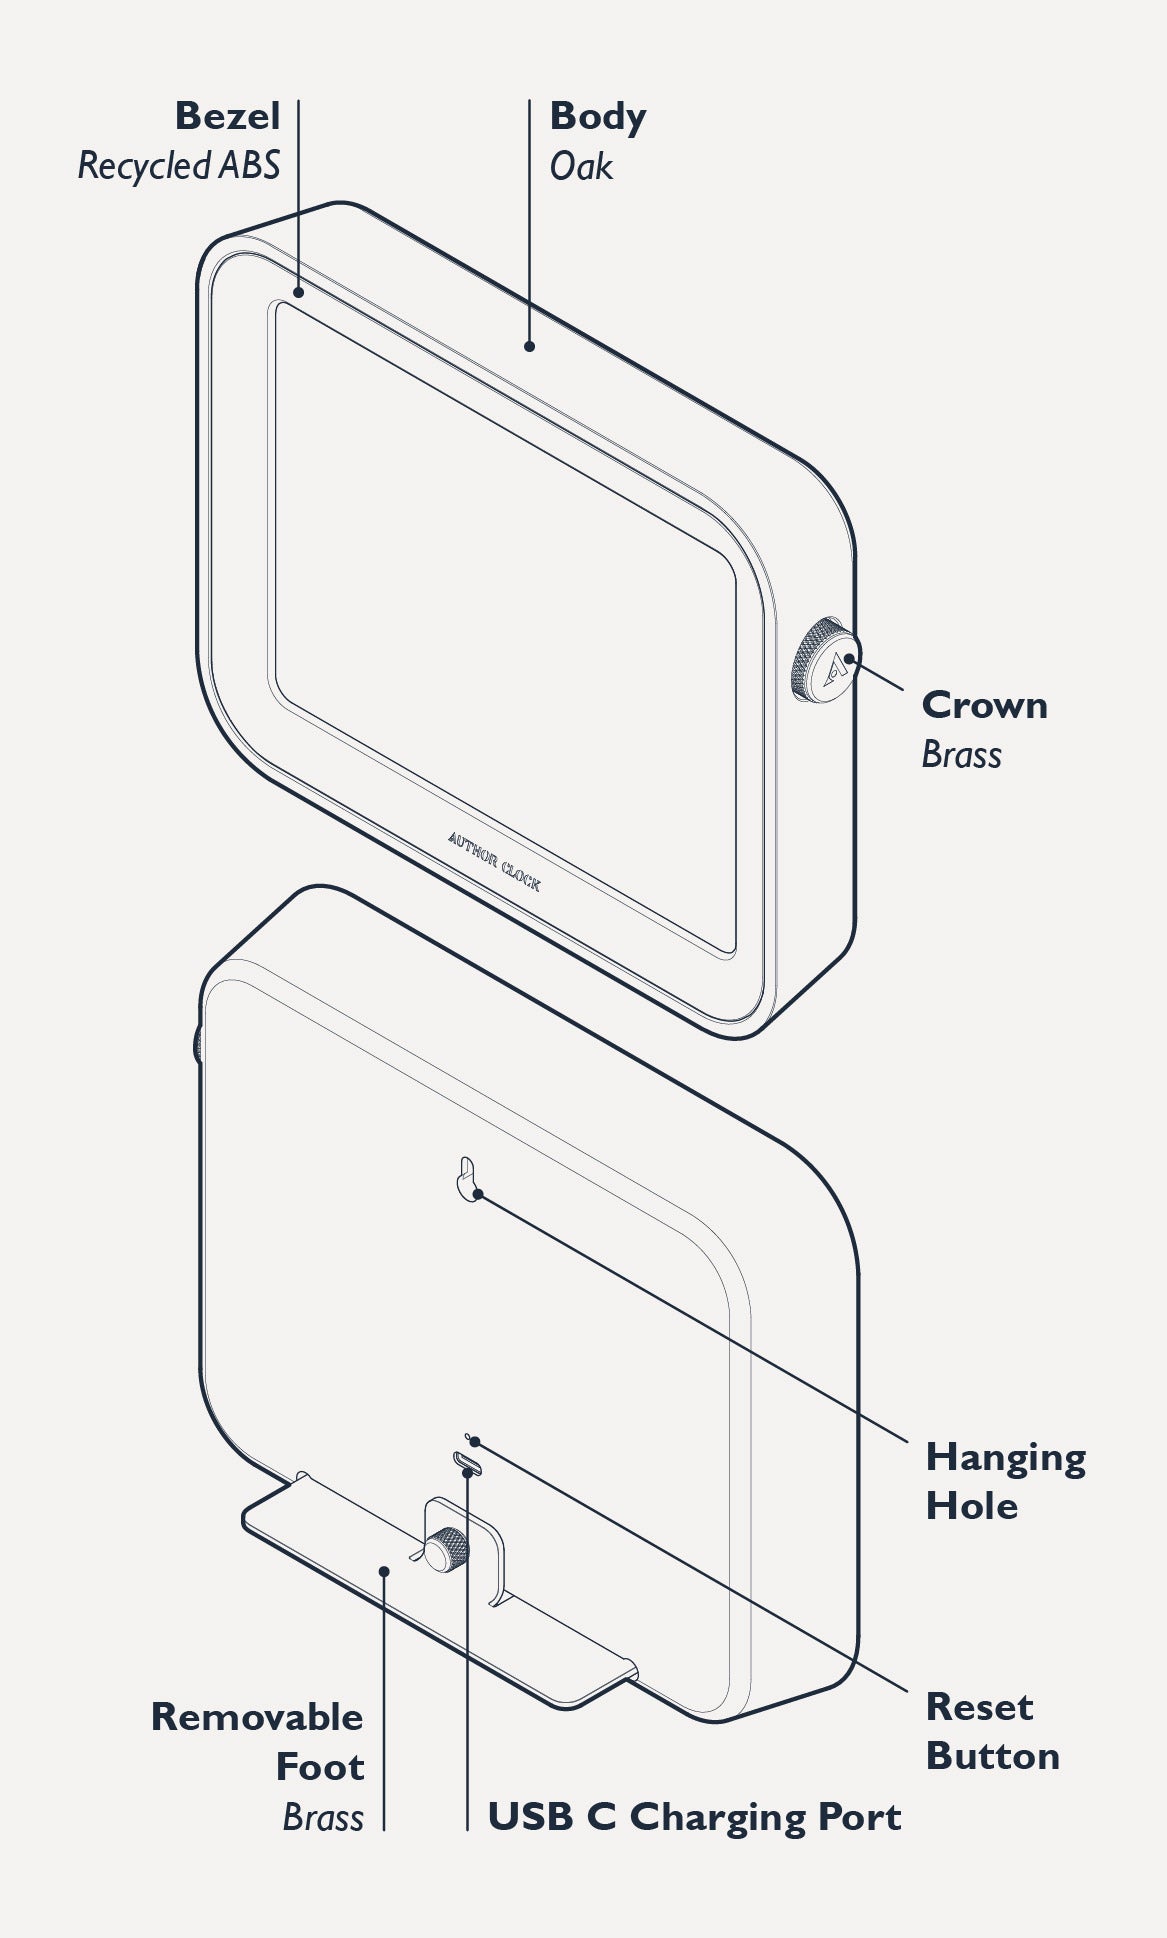
Product Diagrams
Volume 1 | Small
Volume 2 | Large
Author Clock FAQs
Author Clock keeps accurate time even without Wi-Fi, and you can set the time manually. However, new quotes and software updates require a 2.4ghz internet connection.
No. Author Clock works offline to display stored quotes and time. Wi-Fi is only needed occasionally for updates.
Check that your clock is running software version 2.0 or higher in the Status screen. If not, update your clock, then run Quick Setup to set your timezone. You’ll only need to do this once—your clock will adjust for Daylight Saving Time automatically in the future.
Go to Settings › System Settings › Software Update › Check for Updates. You can also select Quick Setup to reinstall the newest version.
When charging your Author Clock, please make sure that it's connected to a working outlet, and that the USB-C cord is completely seated in the clock. Then, while it's charging, you'll want to press on the crown on the side of the clock to wake it up from low power mode.
A low-battery icon will appear in the upper-left corner of your Author Clock’s screen when the battery level is running low and it’s time to recharge.
Use a paperclip to press the small Reset button above the USB-C port, then reconnect the clock to power for a short charge before turning it back on.
No. Author Clock runs on a rechargeable battery, but you can leave it plugged in continuously if you prefer never to recharge it manually.
Battery life depends on your settings, and ranges from one week to one month. Frequent screen updates and Wi-Fi checks use more power. For longer battery life, reduce the update frequency or keep your clock plugged in.
The clock will display a static Power Off quote on the screen. This uses no battery power and functions the same as turning it completely off.
- Press the brass crown on the side of your clock to access the main menu
- The page will display of the following headers: "Ajustes," "Paramètres," or "Einstellungen"
- Scroll down to the option labeled "Adjustes del sistema," "Paramètres du système," or "Systemeinstellungen," and press the crown
- Scroll down to "Idioma," "Langue," or "Sprache," and press the crown
- Scroll to your desired language and press the crown
Manual Software Reinstall
If you are seeing empty quote screens, frozen menus, or unusual behavior, your device may need a full software reinstall. These installers completely refresh the internal chip and usually resolve the issue.
You will need a Windows PC or Mac, a USB-C cable compatible with your computer, and your Author Clock.
2. Download the installer
The download will start automatically when you click a link below. If it doesn’t begin, please try again.
3. Install the update
- Plug your Author Clock into your Windows PC or Mac using a USB-C cable
- Open the installer you downloaded
- Follow the on-screen steps to complete the reinstall
- The process takes about 20 minutes
- Your Clock will restart when complete
- Follow the quick setup guide
4. If your device is unresponsive
If your Clock won’t turn on, is frozen on a blank screen, or you can’t reach the Status menu, please email our team at info@authorandco.com.
We’ll help determine your board version and provide the correct installer.
Please do not guess which version you have, as using the wrong installer may cause further issues.
Let’s get this sorted together
If the information above does not help to resolve your issue, please reach out to us via our Contact Form, or email us at info@authorclock.com.
We will reach out to you directly to follow up to ensure you get the most out of your Author Clock.
If there is any issue we cannot fix for you, we will gladly replace your device at no cost.